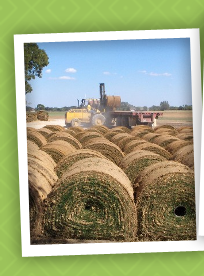
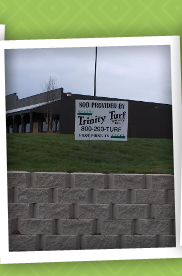
Welcome to theTrinity Turf information page. We are the premier provider of Turf Sod. Our goal is to provide the very best in Turf Sod.
Because our quality control standards are high, our product is among the best in the business. Our goal is to always deliver quality product. We want you, our valued customer, to be happy. |
|
|
Step-by- Step Preparing the site |
Prepare the Site
Follow these simple steps for a beautiful, healthy and trouble-free lawn.
 Clear the site of all building materials (wood, cement, bricks, etc.) as well as any buried stumps, rocks, stones or other debris that are any larger than 2 inches in diameter. Clear the site of all building materials (wood, cement, bricks, etc.) as well as any buried stumps, rocks, stones or other debris that are any larger than 2 inches in diameter.- Rough grade the entire area to eliminate any drainage problems on the property. This would include sloping the grade away from building foundations, eliminating or reducing severe slopes and filling low-lying areas. A tractor mounted blade and/or box are most often used for rough grading, but if the area is small, it can be done with hand tools. The rough grading, will probably uncover more debris that should be removed.
- Initial tillings to a depth of at least 2 inches, should be completed prior to adding any topsoil or soil amendments. This will control most annual weeds, alleviate subsoil compaction, permit a bonding of the topsoil and improve root penetration as well as air exchange and water movement.
- Add topsoil to achieve a total topsoil depth of 4-6 inches, after firming. The topsoil should be a loamy sand, sandy loam, clay loam, loam, silt loam, sany clay loam or other soil suitable for the area.
- Test soil for Ph and nutrients to determine if any pH correcting materials or nutrients are required.
- Apply fertilizer to correct any deficiences following the product’s recommended rate. To avoid root injury to new turfgrass, the fertilizer should be raked into the top 3-4 inches.
- Finish grade the entire site, maintaining the rough grading contours and slopes, with a tractor-mounted box blade for large areas or a heavy-duty rake for small sites.
- Roll the area with a lawn roller one-third of water to firm and settle the surface. Low spots should be filled to match the surrounding grade surface. If time permits, allow area to settle further with rainfall or by applying irrigation.
(source: TPI Turfgrass Producers International) |
|
|
Step-by-Step Installation |
Measuring and Ordering
With a tape, measure the area of your planned lawn. Include these measurements on a sketch of the lawn area, with the length, width, and any unusual features. Schedule your turgrass delivery after you have completed your soil and site prep and are ready to install the turfgrass. Prompt installation on the day of delivery is crucial.
 Grass is available in the following: Grass is available in the following:
450 sq ft pallet (50 sq yds)
500 sq ft pallet (55.56 sq yds)
450 sq ft 42×128 rolls (50 sq yds)
Turfgrass Installation
Prior to installing your turfgrass sod moisten the soil and install your lawn immediately upon delivery.
In hot weather, protect unlaid turf by placing stacks or rolls in the shade. If possible, cover with a moist cloth, or lightly water the unprotected turf.
Begin installing turf along the longest straight line, such as a driveway, sidewalk or patio. Butt and push edges and end against each other tightly, without stretching. Avoid gaps or overlaps. Stagger joints in each row in a brick-like fashion, using a large sharp knife to trim corners, edges, etc. Avoid leaving small strips at outer edges as they will not retain mositure. On slopes, place the turf pieces so they run across the slope rather than up and down the slope.
To prevent indentations or air pockets avoid repeated walking or kneeling on the turf while it is being installed or just after watering.
After installing the turfgrass, roll the entire area to improve turfgrass/soil contact and remove air pockets.
Caution!!
During the first few weeks, avoid heavy concentrated use of your new lawn. This gives the roots an opportunity to grow into the soil and ensures the turf will remain smooth.
(source: TPI Turfgrass Producers International) |
|
|
Post installation of TurfGrass |
The following recommendations from The Lawn Institute ( thelawninstitute.org ) will help you maintain a thick, healthy lawn after natural turfgrass sod has been installed.
FERTILIZER
The type and quantity of fertilizer required for your lawn will depend on your grass variety. Cool and warm season grasses vary as do their nutrient requirements. Check with your Extension Service, local nursery or lawn and garden professional to determine what type of fertilizer is best for your lawn.
MOWING
The turfgrass can be mowed when it is rooted. Be sure to remove no more than 1/3 of the grass blade. The actual height of the cut varies depending on whether the grass is a cool or warm season and the type of grass.
Around 3 weeks after installing pull on the grass and if the roots stay in place you are ready to mow.
Keep your mower blades sharp. Dull blades tear the grass blade instead of cutting it cleanly. These small rips in the turfgrass tissue can cause the grass to lose more water, increase irrigation needs, creat stress, and make the lawn more vulnerable to diseases.
Grass Clippings
Leave the grass clippings. Contrary to popular belief, they do not cause thatch. (Thatch usually occurs only when turf is excessively fertilized and soil is complacted, coll and moist.) If you follow the 1/3 cutting rule grass clippings won’t smother the grass plants. They will dry out and work their way down to the soil, resulting in less fertilizer use. They also cool the soil and help it retain water.
THATCH
Thatch is a layer of dead and decomposing plant tissue that forms above the soil. A thin 1/2 inch layer is beneficial to a lawn. It protects plant crowns and reduces compaction. But if the layer gets too thick, water , air and fertilizer can’t get through to the soil and grass roots. Runoff increases and dry spots appear. Or when it’s wet, the thatch can remain saturated and suffocate roots. Thatch usually occurs on turf that has been heavily fertilized, and is most common on poorly drained, compacted and acidic soils. Some species of lawn grasses are more prone to thatch problems than others. Severe thatch problems left unattended may eventually require the use of a dethatching machine. To prevent or minimize thatch problems, core aeration is an option depending on your situation.
AERATION
Core aerators punch small holes in the lawn allowing air and moisture to penetrate through the holes. It is mos effective in late summer when temperatures are starting to coll and the soil is only slightly moist.
After aeration, leave the soil cores on the surface to dry. Then rake them to distribute the soil down through the grass to mix with and dilute the thatch. The mixing action core aeration is similar to that provided by earthworms. Core aeration can also help increase water infiltration on compacted soils. Contract with a local landscape compnay for dethatching or core aeration service or check with your local equipment rental center.
(source: TPI Turfgrass Producers International) |
|
|
|
WHEN TO WATER
It is essential to begin watering new turfgrass sod within a half hour after it is installed or placed on the soil. Apply at least 1 in of water so that the soil beneath the turf is very wet. Ideally, soil 6 inches below the surface will be moist.
Water as early in the morning as possible to take advantage of the grass’s normal growing cycle. Morning is ideal because of lower wind speeds and less water is lost to evaporation. Watering in the evening is discouraged because water remaining on the grass can promote disease and fungus.
Infrequent and deep watering is preferred to frequent and shallow watering. Roots will only grow as deep as their most frequent available water supply. Deeply rooted grass has a larger “soil-water bank” to draw moisture from and this helps the grass survive drought conditions and hot weather that dries out the upper soil layer.
 WATERING WATERING
Water is essential to all life… too little water and we die, too much water and we drown. The same is true of the grass in our lawns. Water makes up 70% to 80% of the weight of grasses and the clippings alone are nearly 90% water. While most people are concerned about not watering their lawns enough, the fact is, more lawns are damaged by overwatering.
HOW TO WATER
Proper watering techniques are important. Here are several helpful suggestions.
Avoid hand watering because it cannot provide uniformity. The only possible exception to this guideline would be the need to water the surface of the grass to cool it, or to provide additional water near building or other heat-reflecting surfaces.
Understand each sprinkler has its advantages and disadvantages. Proper use is determined by the type of sprinkle you select.
IN-GROUND SYSTEMS require professional installation, routine adjustments and proper maintenance to be effective. The greatest mistake made in most in-ground systems is the “set it and forget it” philosophy that fails to account for changing seasonal water requirements to maximize turf growth or allows the system to operate following adequate rain. Another frequent problem is when sprinkler heads get out of alignment and apply water to the sidewalk, street, or house siding, rather than to the lawn.
Watering difficult areas such as slopes and under trees requires special attention to achieve maximum coverage and uniformity.
The amount of water your lawn requires and receives will determine its overall health, beauty and its ability to withstand use and drought. Keep in mind that too much water can ruin a lawn just as fast as too little water.
One inch a week is a watering “rule of thumb” (by rain or watering) suggested for most lawns; however, this will vary betweem different turf species and even among cultivars within a specie, seasonal changes and different soil types.
(source: TPI Turfgrass Producers International) |
|